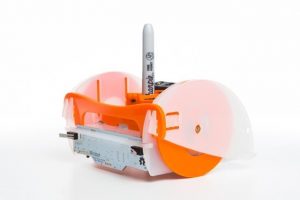
 We use the Mirobot “logo turtle” in the OpenSTEM® Robotics Program, and the Mirobot kits are also for sale in our store for people in Australia.
This page contains a number of links to Mirobot resources, so it’s a good page to bookmark if you have a Mirobot!
Hints
- Only use 4 regular 1.5V AA batteries, so not 1.2V rechargeables. Sorry! The lower voltage of rechargeables is insufficient to make particularly the pen servo move.
You’ll find that the batteries last a really long time, just ensure the unit is switched off when not in use. - If, at some point. you find that the wifi connection drops every time you try to have the robot move or control the pen, the most likely cause is that the batteries are almost depleted.
Mirobot v3
We now use the Mirobot v3.
The Mirobot v2 information is still, below.
For the v1 model, please refer to learn.mirobot.io or contact us.
Assembly
- Building the Mirobot v2 (Chassis)
- Mirobot v2 OpenSTEM Soldering Guide (PDF 5 MB, rev.2015-12-06)
The soldering component is exclusive to OpenSTEM, so please don’t contact Ben @ Mirobot or the general mailing list for questions about this. Email mirobot (at) openstem (dot) com (dot) au. Not that currently we can’t offer the un-soldered kits any more, due to the v2 manufacturing process. Sorry! Only pre-soldered. There’ll be other soldering projects!
Using
- There are OpenSTEM’s own classroom workbooks and other materials, as part of our Robotics Program.
- apps.mirobot.io – different user interfaces
- Python library for talking to the Mirobot (on Github)
- learn.mirobot.io – ideas to explore with the Mirobot
Support
- Email mirobot (at) openstem (dot) com (dot) au
- Mirobot Google Group
Source Files
- Chassis design (PDF files on Github, SVG also available)
- PCB design (KiCAD files, on Github)
- Arduino code (on github)
- UI software (on Github)

Aunt Madge's Suitcase was a really fun activity! The children were really interested in all the places she travelled to,…
Indi Alford, Teacher